Ever pondered what your summer look is missing? Could it be a splash of color at your fingertips, a creative twist to your everyday style? Summer almond nails colors & designs ideas – how do they transform an ordinary day into a fashion statement? Let’s find out, shall we?
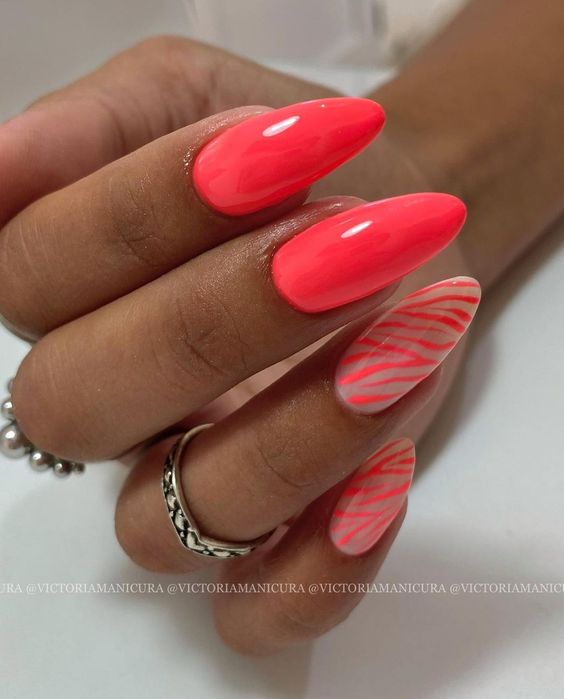
Vivacious Coral: The Summer Statement
Professional Insights: Almond nails whisper elegance, but when you bathe them in a vivacious coral hue, they shout summer fun! This short and sweet look is perfect for those who want a blend of maintenance and glamour. The glossy finish and the solid color choice here not only flatter dark skin tones but also add a touch of youthful exuberance to any outfit.
Materials Required:
- Base coat: CND Stickey Base Coat
- Coral polish: Essie’s “Tart Deco”
- Topcoat: Seche Vite Dry Fast Top Coat
DIY Tips: Begin with a clean, shaped nail. Apply your base coat to protect your nails, then swoop on two thin coats of that tantalizing coral. Let each coat dry thoroughly, then seal with a high-gloss topcoat for that enviable shine.
Icy Blue Elegance
Professional Insights: Cool as an iced latte on a sizzling day, these long, sleek almond nails are a breath of fresh air. The icy blue tint exudes a serene vibe, while the glossy, almost chrome-like finish provides a mirror-like sheen that catches the light – and envious glances!
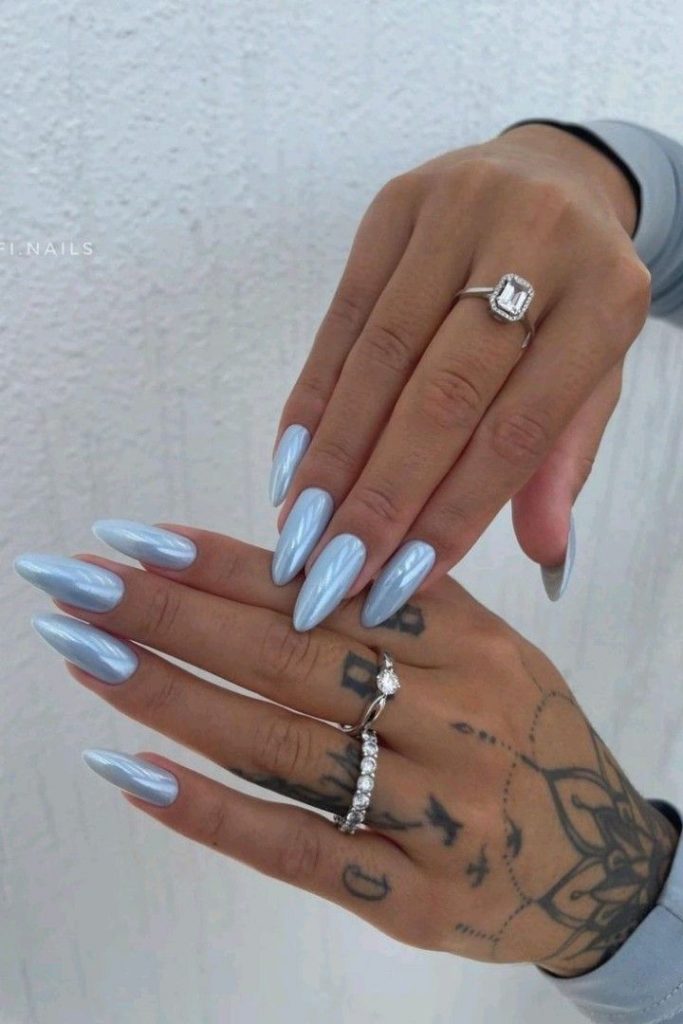
Materials Required:
- Base coat: OPI Natural Nail Base Coat
- Blue polish: OPI “It’s a Boy!”
- Topcoat: Sally Hansen Miracle Gel Top Coat
DIY Tips: Prep your nails with a base coat to avoid staining. When applying the blue polish, be patient and use even strokes. Finish with a top coat to lock in color and add that gel-like finish without the need for UV lamps.
Electric Green Envy
Professional Insights: Neon nails? Yes, please! This neon green hue on almond-shaped nails is not for the faint-hearted. It’s bold, it’s bright, and it’s all things summer. It stands out brilliantly on all skin tones and pairs nicely with simple or full multi-colored attire.
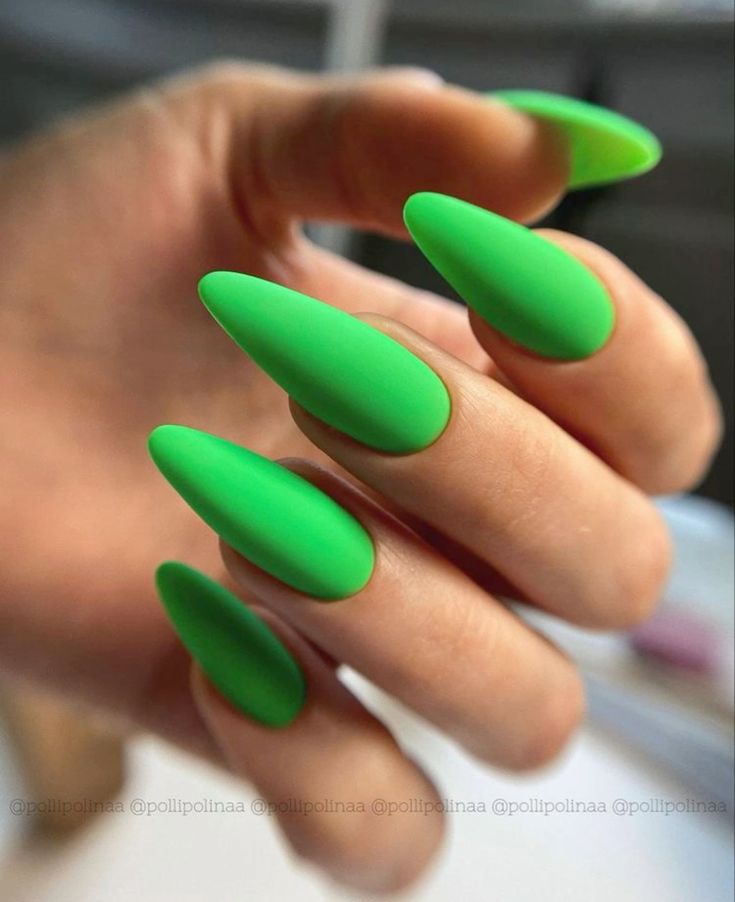
Materials Required:
- Base coat: Butter London Nail Foundation Priming Basecoat
- Neon green polish: China Glaze “I’m With the Lifeguard”
- Topcoat: INM Out The Door Fast Drying Top Coat
DIY Tips: Neon polishes can be sheer, so start with a white base coat to make the color pop. Apply 2-3 layers of your neon polish, waiting between each layer for drying. Once done, a quick-dry top coat will add shine and durability.
Ombre Pink Fantasy
Professional Insights: Ombre isn’t just a hair trend, it’s a nail craze too! These almond nails with a pink ombre effect are nothing short of a whimsical dream. The gradient from soft pink to a bolder tone at the tips is like a sunset for your nails.
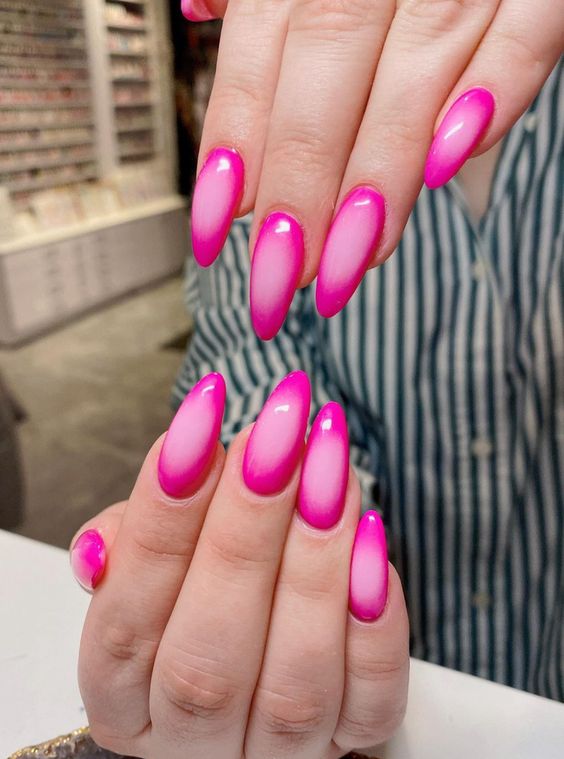
Materials Required:
- Base coat: Deborah Lippmann All About That Base
- Pink polishes: Essie “Muchi, Muchi” and “Bachelorette Bash”
- Sponge for ombre effect
- Topcoat: Revlon Extra Life No Chip Top Coat
DIY Tips: After your base coat, apply the lighter pink as your base color. Then dab your sponge into the darker pink and lightly press it onto the tips of your nails, blending it down to create the ombre effect. Seal it with a topcoat for a smooth transition.
Pastel Rainbow Tips
Professional Insights: These nails are a playful twist on the classic French tip, substituting white with a pastel rainbow palette. It’s a creative pattern that’s fun yet sophisticated, making it a versatile choice for summer.
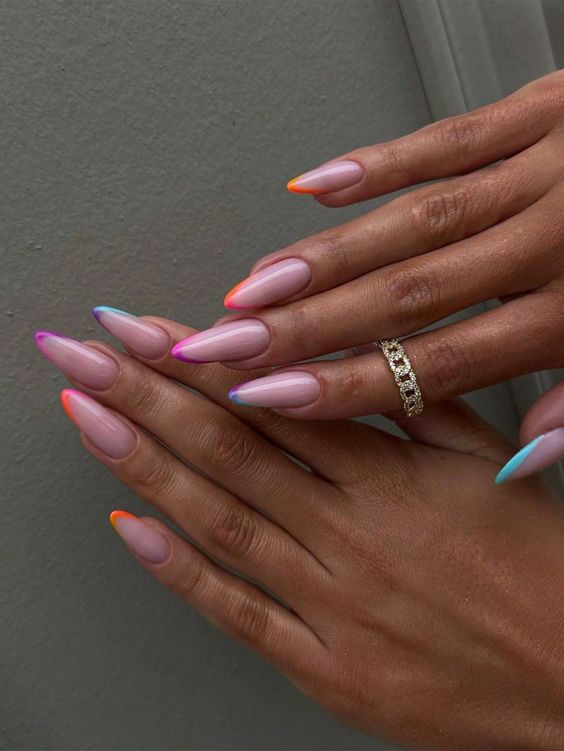
Materials Required:
- Base coat: Zoya Anchor Base Coat
- Pastel polishes: Sally Hansen’s Complete Salon Manicure in shades “Mint Condition,” “Peach of Cake,” and “Let’s Snow”
- Topcoat: Essie Good To Go Top Coat
DIY Tips: After applying your base coat, paint a sheer nude as the base. Use a thin brush to delicately paint the tips in alternating pastel colors. Finish with a fast-drying top coat for a flawless look.
Dreamy Sunset Gradient
Professional Insights: Embrace the allure of summer skies with these ombre nails that seem to borrow hues from a dreamy sunset. The gentle gradient transitions from a soft peach to a rosy pink, while a luminous touch of blue adds a hint of the ocean’s calm. This design is perfect for those seeking a blend of pastel and neon without going over the top.
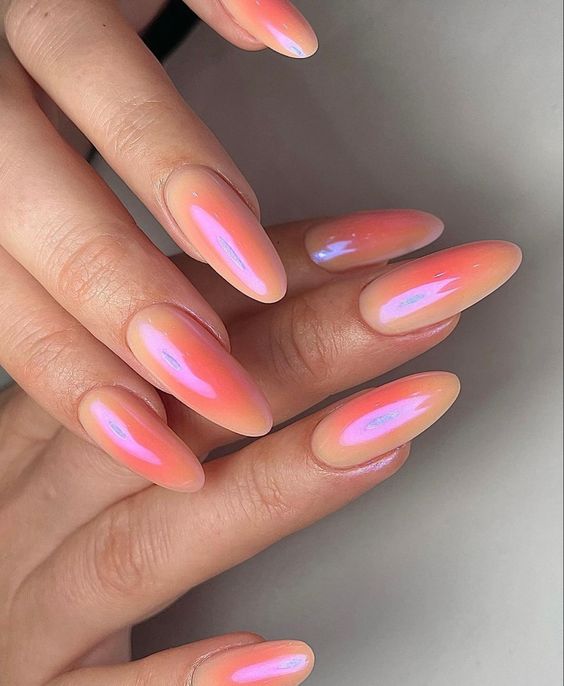
Materials Required:
- Base coat: ORLY Bonder Rubberized Basecoat
- Peach polish: OPI “Freedom of Peach”
- Pink polish: Zoya “Brie”
- Blue highlight: ILNP “Blueprint”
- Topcoat: Essie Gel Setter Top Coat
DIY Tips: For the smoothest gradient, use a makeup sponge to layer and blend the colors. Apply the base coat, then layer your polishes on the sponge and dab onto the nail until you’re satisfied with the blend. Seal with a topcoat for a glossy finish.
Playful Pastel Print
Professional Insights: This is where the wild side of summer meets elegance. The playful pastel pink serves as a backdrop for a tasteful arrangement of animal prints and foliage accents. It’s a daring yet delicate balance, a simple statement piece for the adventurous at heart.
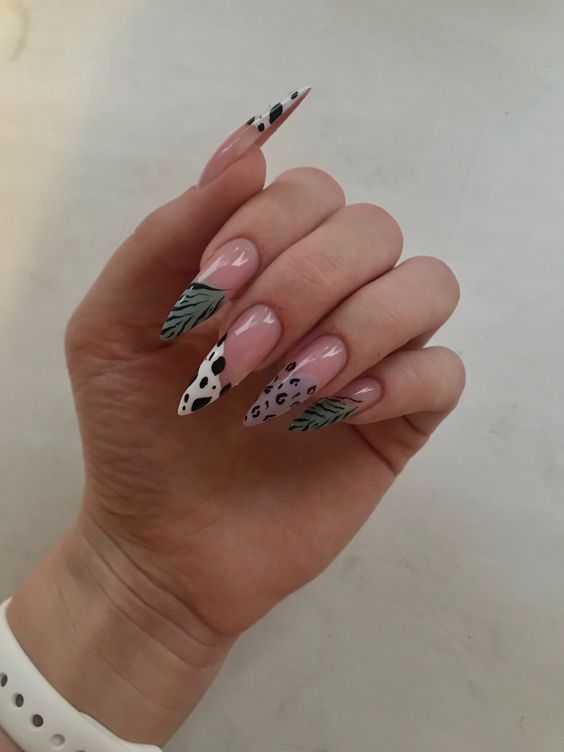
Materials Required:
- Base coat: Essie Grow Stronger
- Pink base polish: CND Shellac “Cake Pop”
- Black detailing polish: Sally Hansen Nail Art Pen in Black
- Leaf green polish: Essie “Mojito Madness”
- Dotting tool or fine brush
- Topcoat: Glisten & Glow Top Coat
DIY Tips: After your base coat and pink polish, use the dotting tool or fine brush to add animal prints and leaf details. Practice the designs on paper first if you’re new to nail art. Finish with a topcoat to protect your design.
Glitter Encapsulated Elegance
Professional Insights: Nothing says glitter and glamour like encapsulated nail art. This design with pink flecks trapped within a clear acrylic overlay is a nod to the creative potential of summer acrylic bright designs. It’s sophisticated yet whimsical and suitable for all nail types.
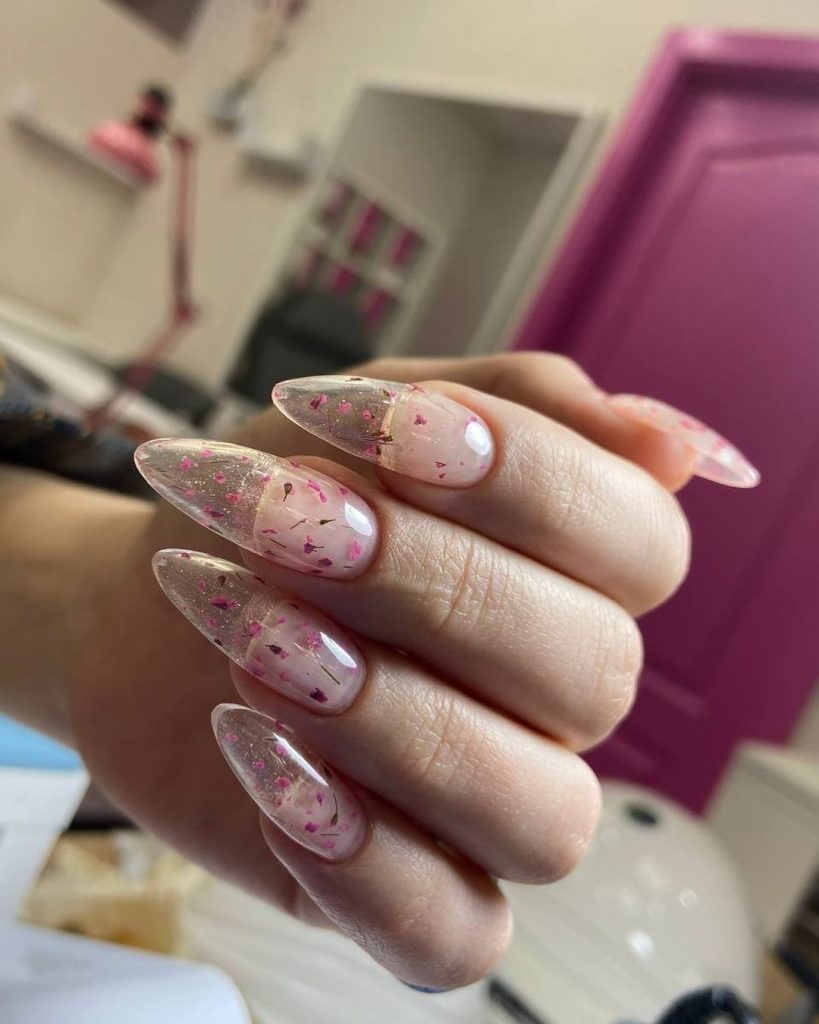
Materials Required:
- Base coat: Kiara Sky Base Coat
- Pink glitter flakes: Born Pretty Nail Sequins
- Clear acrylic powder: Mia Secret Clear Acrylic Powder
- Acrylic liquid: Young Nails Monomer
- Topcoat: Kiara Sky No-Wipe Top Coat
DIY Tips: After the base coat, sprinkle glitter on the wet polish or mix it into your clear acrylic powder. When applying acrylic, work quickly and efficiently to shape the nail before the mixture sets. Cap with a no-wipe topcoat for lasting shine.
Fresh French with a Twist
Professional Insights: A fresh take on the classic French tip, these almond nails are a testament to summer’s love affair with pastel. The neon green tips give a pop of playful color against the muted lavender base, creating a look that’s fresh and full of zest.
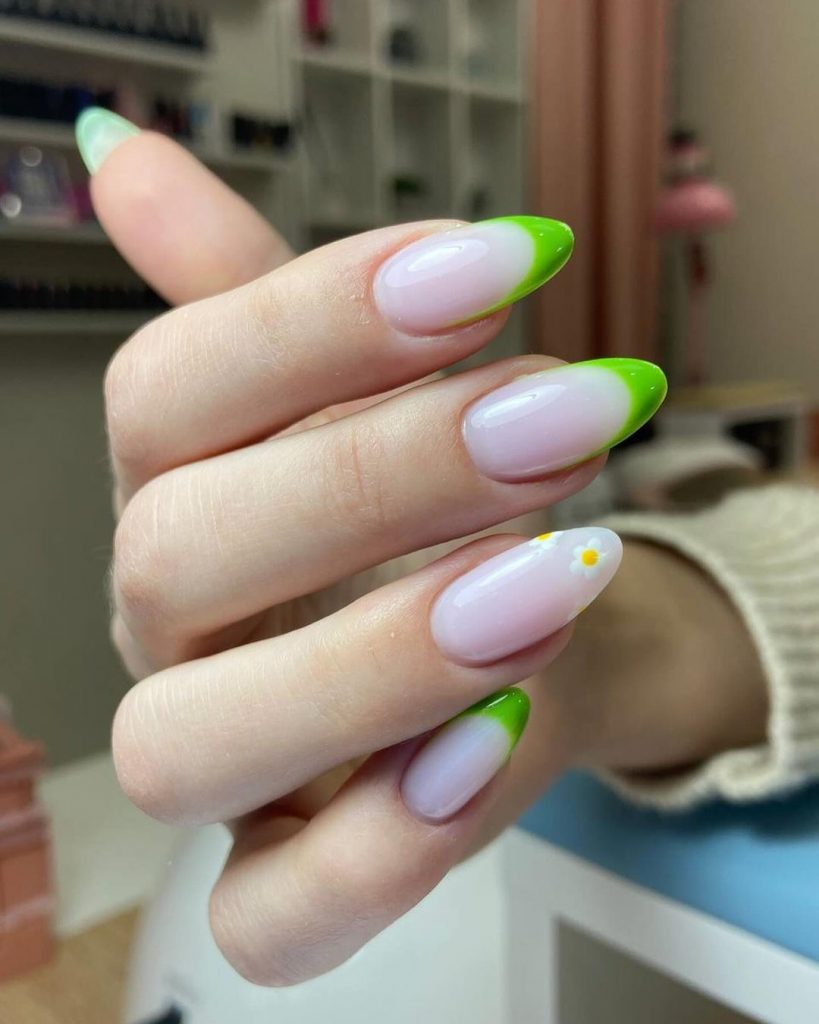
Materials Required:
- Base coat: Duri Rejuvacote
- Lavender polish: Essie “Go Ginza”
- Neon green polish: Orly “Glowstick”
- Topcoat: China Glaze Fast Forward Top Coat
DIY Tips: Paint the nails with your lavender base. Once dry, carefully apply the neon green to the tips using a steady hand or guide stickers. A swift stroke of topcoat will blend the design seamlessly.
Monochromatic Marvel
Professional Insights: These almond nails celebrate monochrome with a twist. The muted palettes gray and pristine white interchange between fingers, offering a minimalist yet edgy look. The abstract silver chrome striping adds an unexpected burst of brilliance.
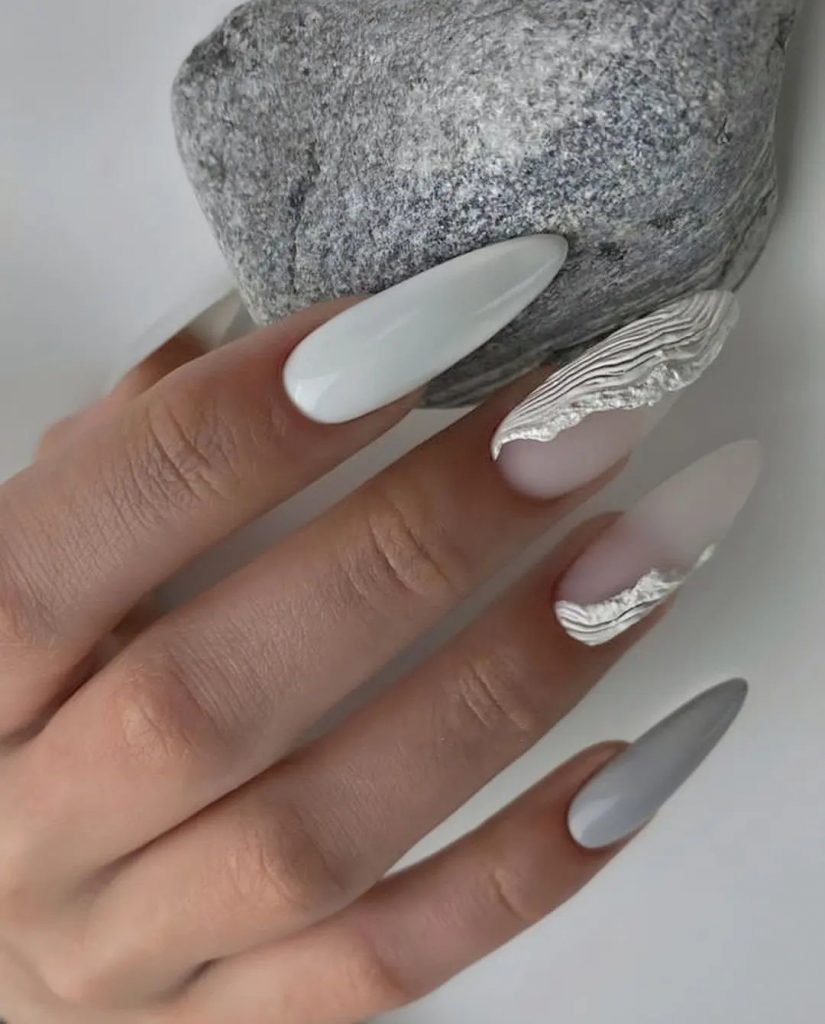
Materials Required:
- Base coat: ORLY Bonder Rubberized Basecoat
- Gray polish: OPI “Suzi Talks With Her Hands”
- White polish: Essie “Blanc”
- Silver chrome striping tape
- Topcoat: Seche Vive Instant Gel Effect Top Coat
DIY Tips: Apply the base coat, followed by two coats of gray or white polish as per finger choice. For the striping, use a pair of tweezers for precision placement of the chrome tape. Seal everything with a gel effect topcoat for durability.
Neon Safari Mix
Professional Insights: This daring ensemble pairs the bright, bold neon orange with acrylic accents of wild animal prints. It’s a fierce look for those who live for summer adventures. A true embodiment of creative patterns, it’s an ode to those who want their nails to be a conversation starter.
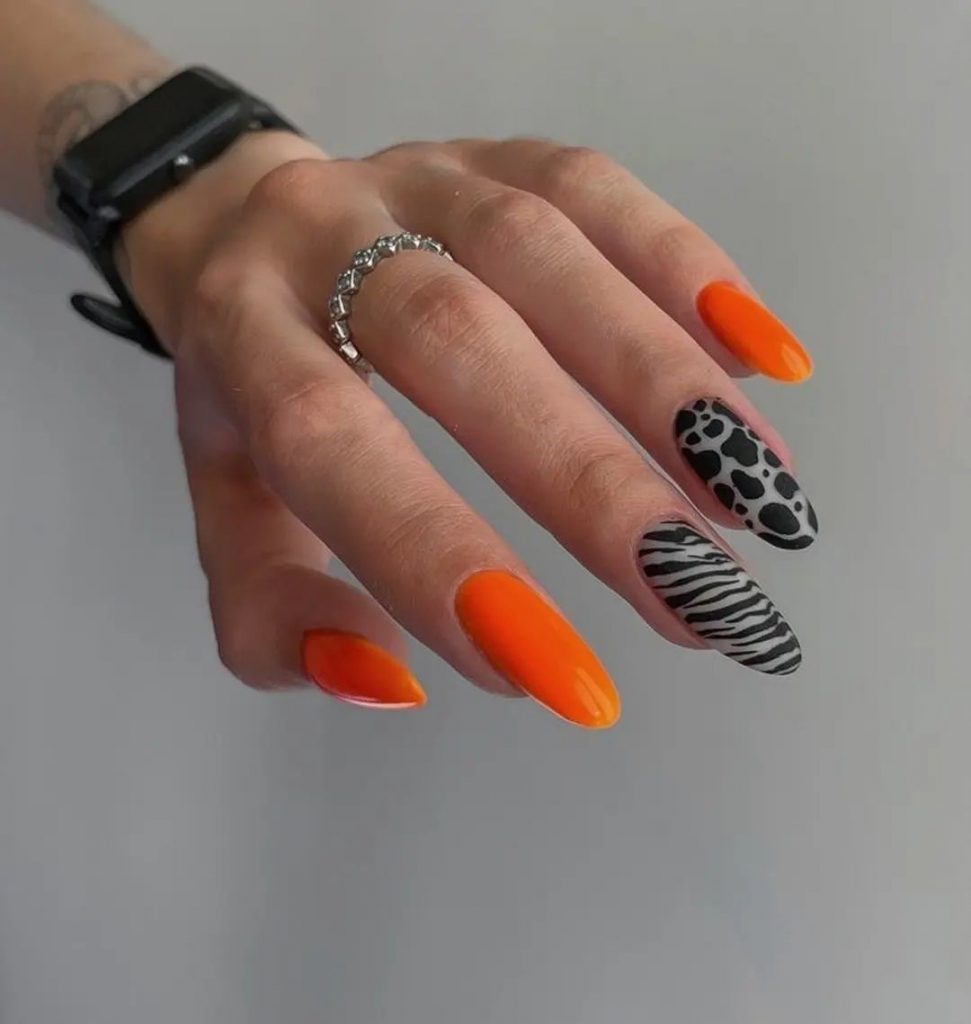
Materials Required:
- Base coat: OPI Natural Nail Base Coat
- Neon orange polish: China Glaze “Sun Worshiper”
- Black polish for details: Sinful Colors “Black on Black”
- Matte topcoat: OPI Matte Top Coat
DIY Tips: To recreate this safari-inspired theme, start with a solid neon base. Use a thin brush for the animal prints, and let your wild side guide the patterns. Finish with a matte topcoat to contrast the vibrant neon.
Sparkling Sand
Professional Insights: This nail design captures the essence of a moonlit beach with its glitter-infused elegance. The subtle ombre of glitter creates a sandy texture reminiscent of summer nights by the sea. It’s an easy, yet stunning look for any nail type, especially those who yearn for a touch of sparkle.
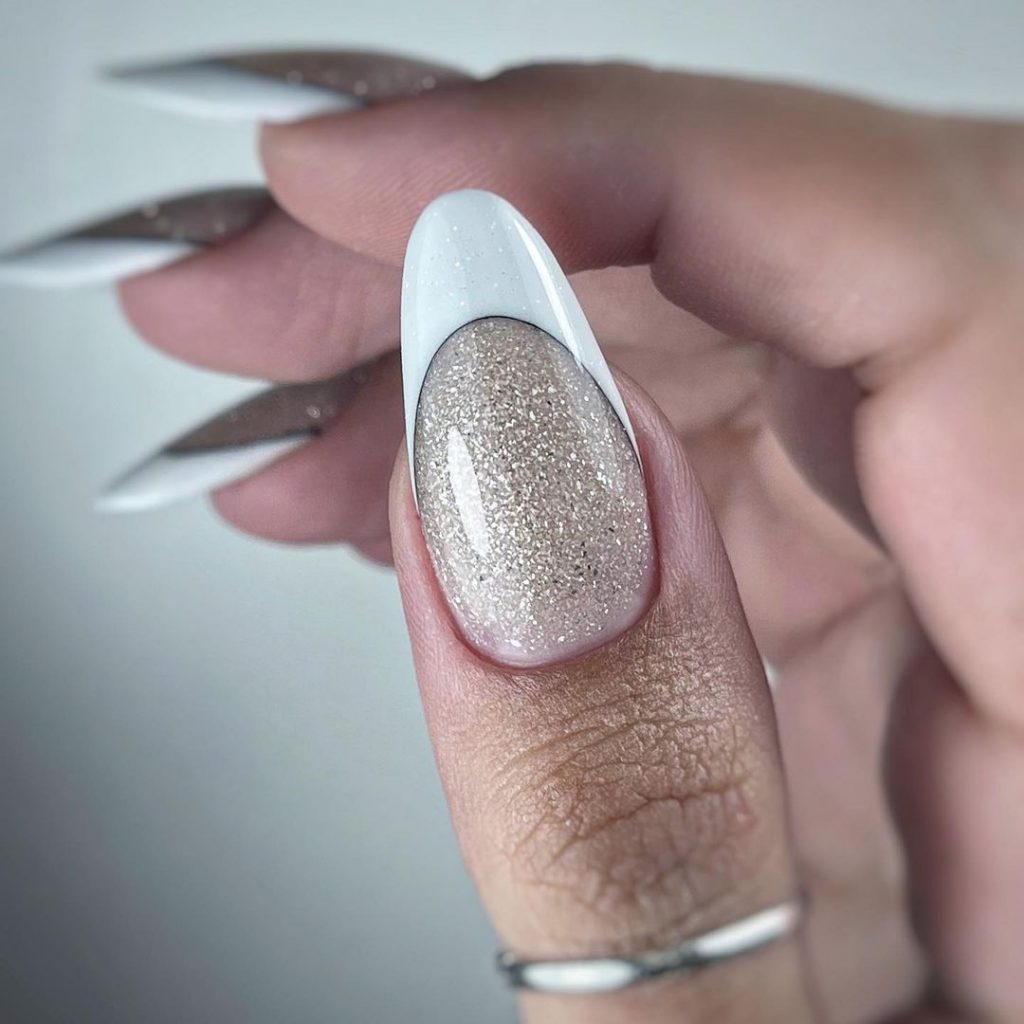
Materials Required:
- Base coat: Sally Hansen Double Duty
- Nude polish: Essie “Bare With Me”
- Silver glitter polish: ILNP “Juliette”
- Topcoat: China Glaze Fast Forward Top Coat
DIY Tips: After the base coat, apply a nude polish as your base. Gradually build up the silver glitter polish from the tip, lessening the amount as you move downwards. Finish with a quick-dry topcoat for a shimmering effect.
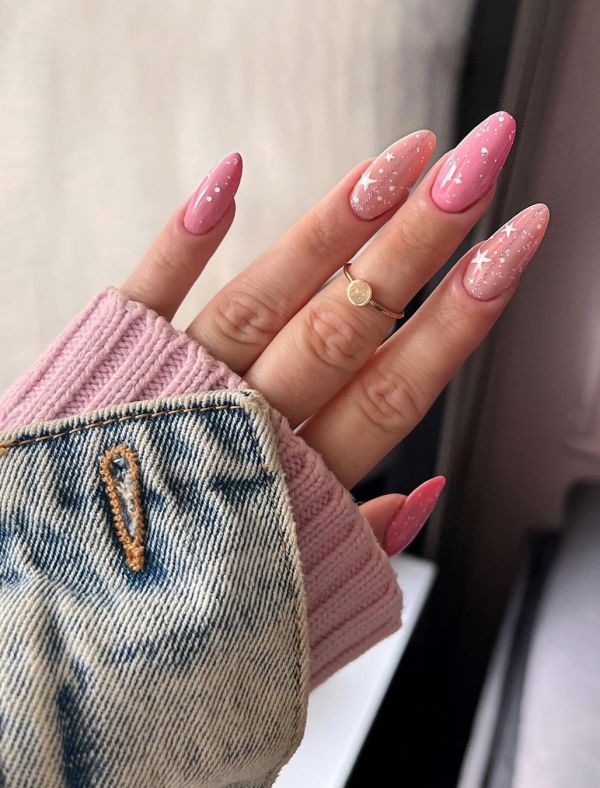
Pink Glaze
Professional Insights: Exuding understated chic, this pink design with a hint of glitter on the crescent moon of the nail offers a fresh perspective on classic elegance. Perfect for those who favor simplicity with a touch of glamour, the design speaks of quiet summer evenings and sophisticated soirées.
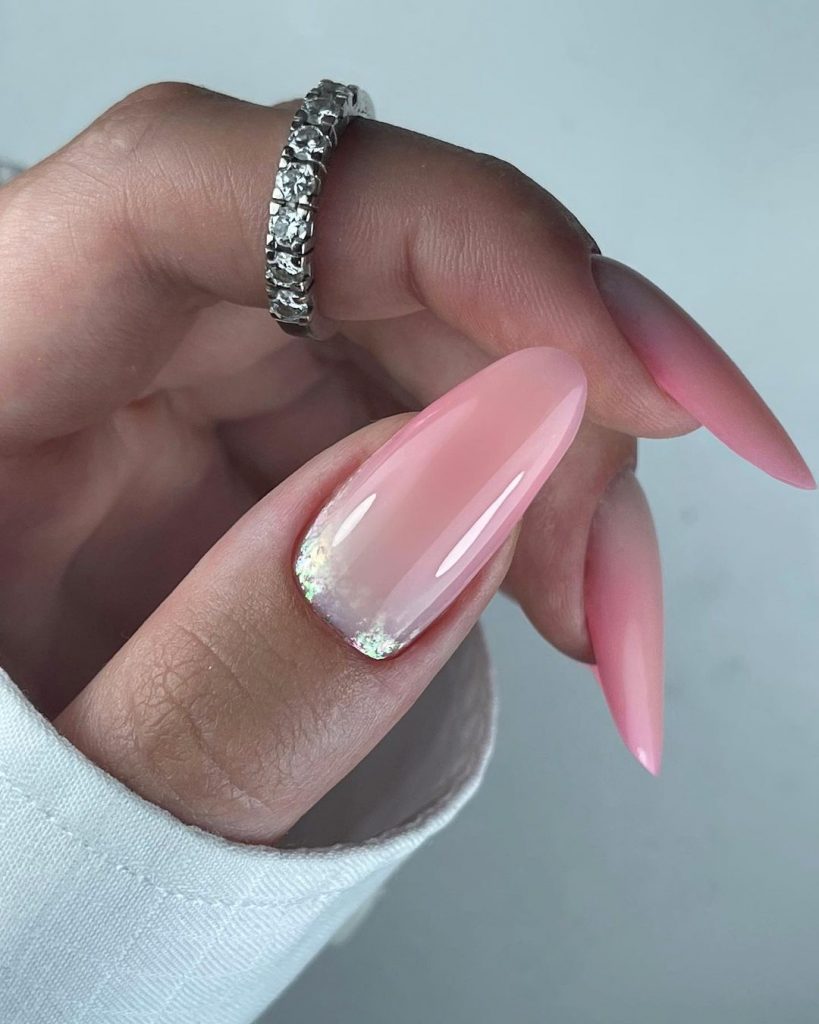
Materials Required:
- Base coat: ORLY Bonder Rubberized Basecoat
- Pink polish: OPI “Princesses Rule!”
- Glitter accent: Nails Inc. “Chelsea Square”
- Topcoat: Seche Vive Instant Gel Effect Top Coat
DIY Tips: After priming your nails with the base coat, sweep on your chosen shade of pink. Use a detail brush to apply a crescent of glitter at the base of each nail, and seal it with a topcoat for a glassy finish.
Sophisticated French with a Dot
Professional Insights: Updating the classic French tip, this design introduces a cool blue and a playful dot pattern on a nude base. It’s a modern take that plays with the traditional expectations of French manicures, perfect for the summer trendsetter.
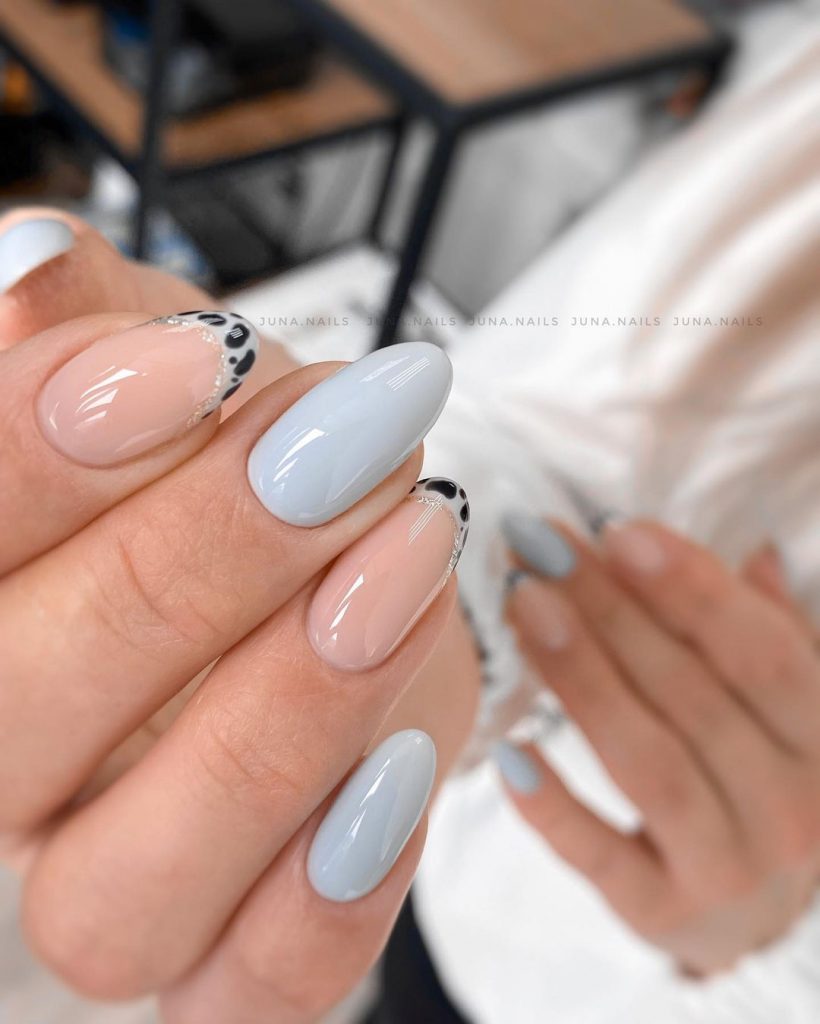
Materials Required:
- Base coat: CND Sticky Base Coat
- Nude polish: Zoya “Avery”
- Blue polish for tips: Essie “Bikini So Teeny”
- Dotting tool or toothpick
- Topcoat: Butter LONDON Hardwear Shine UV Topcoat
DIY Tips: Apply a base coat followed by a nude polish. Once dry, add the blue tips with a steady hand or guiding stickers. Dip the dotting tool in black polish and add dots along the smile line for an added pop. Finish with a layer of topcoat.
Neon Flame Tips
Professional Insights: The neon tips on these almond nails are like flames licking the edge of an otherwise understated design. It’s the epitome of summer acrylic bright with a sophisticated twist, bringing to mind images of late-night campfires on the beach.
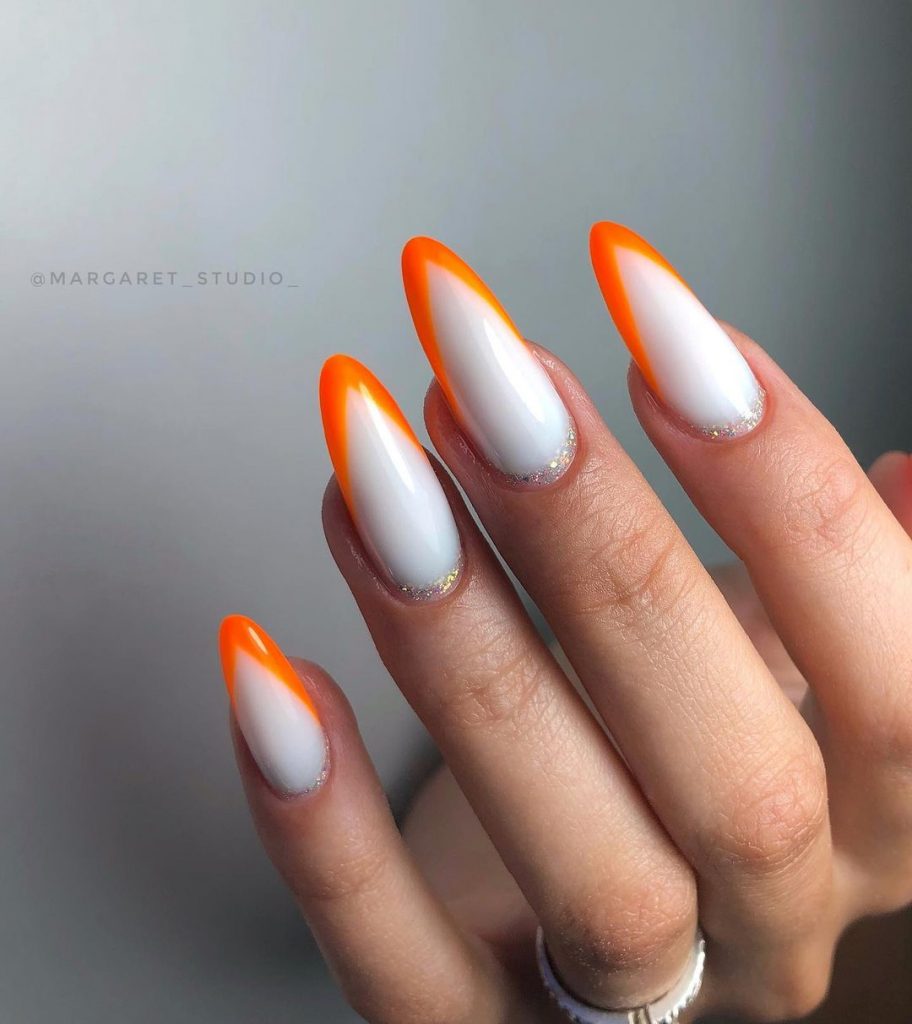
Materials Required:
- Base coat: Essie Strong Start
- White polish: Essie “Blanc”
- Neon orange polish: ORLY “Melt Your Popsicle”
- Glitter accent: Deborah Lippmann “Boom Boom Pow”
- Topcoat: INM Out The Door Top Coat
DIY Tips: Begin with a white base to make the neon truly stand out. Apply the neon orange in a sweeping motion for the flame-like tips, adding a thin line of glitter at the division for an extra spark. A topcoat keeps everything in place and shining bright.
Bold Fuchsia Finesse
Professional Insights: Drenched in a vibrant fuchsia, these almond nails are a statement of bold and unapologetic femininity. The deep pink hue is striking and adds a pop of color that’s perfect for long, sun-drenched days and warm, balmy nights.
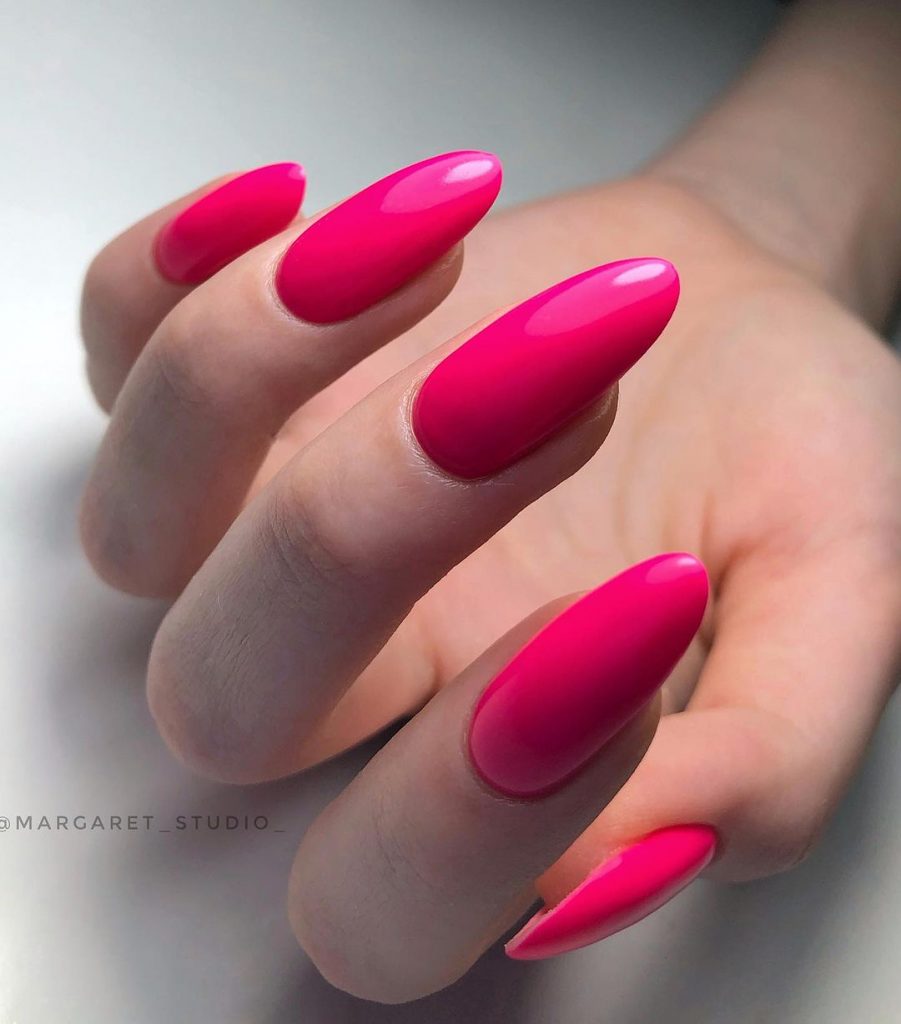
Materials Required:
- Base coat: Jessica Custom Nail Colour in Flirty
- Fuchsia polish: CND Vinylux in Electric Pink
- Topcoat: CND Vinylux Weekly Top Coat
DIY Tips: Start with a nourishing base coat, followed by two coats of the vivid fuchsia polish for full coverage. Cap it off with a durable top coat for a glossy finish that lasts.
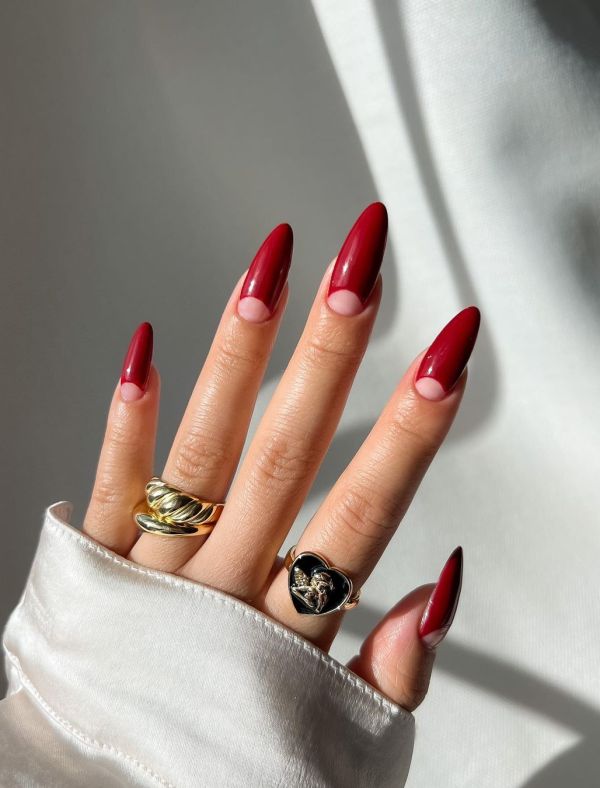
Classic Crimson Luxe
Professional Insights: Embrace the timelessness of a classic red manicure. These almond nails painted in a rich, deep crimson evoke a sense of luxury and sophistication. They’re versatile for day-to-night transitions, complementing dark skin tones beautifully.
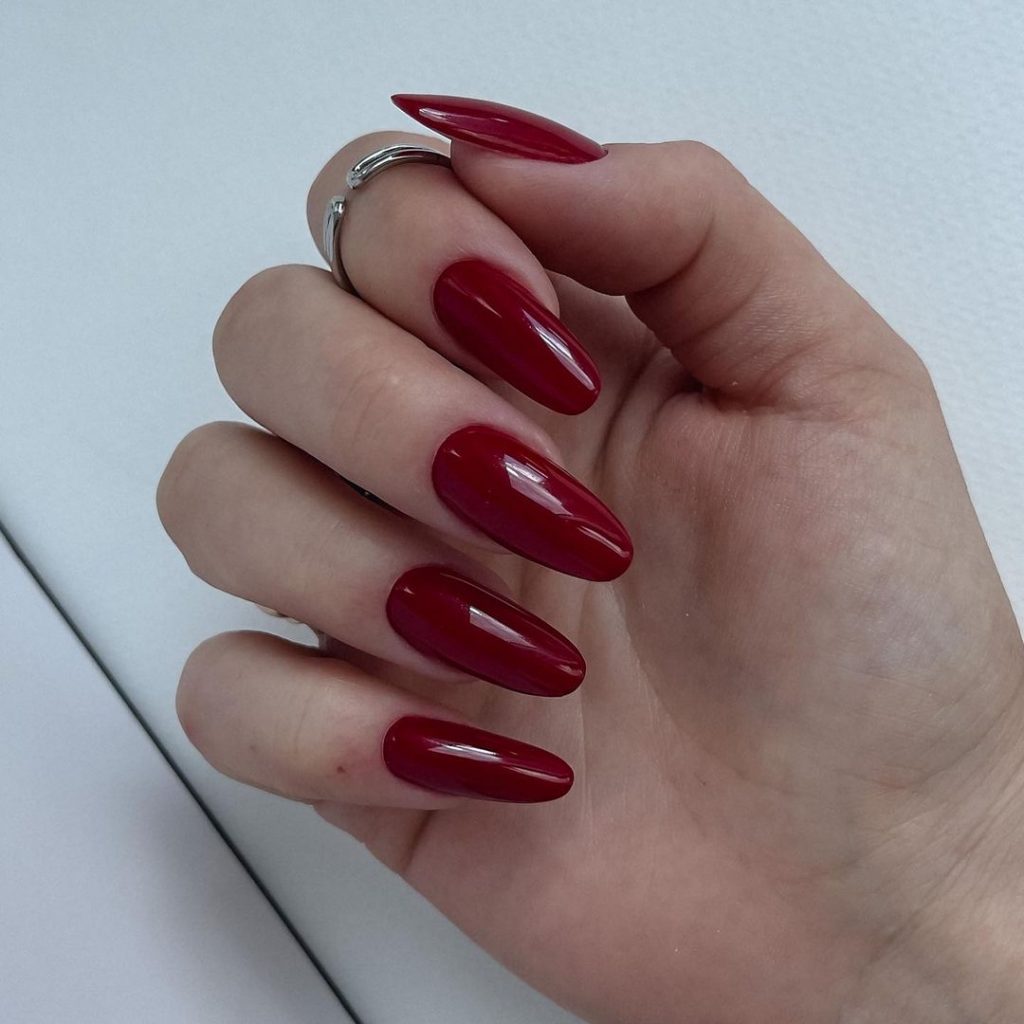
Materials Required:
- Base coat: ORLY Bonder
- Crimson polish: Essie in Bordeaux
- Topcoat: Essie Gel Setter Top Coat
DIY Tips: Ensure a clean nail surface before application for the polish to adhere smoothly. After the base coat, apply the crimson polish evenly, allowing each layer to dry thoroughly. Finish with a glossy topcoat for that gel-like shine.
Pink Flamingo Flair
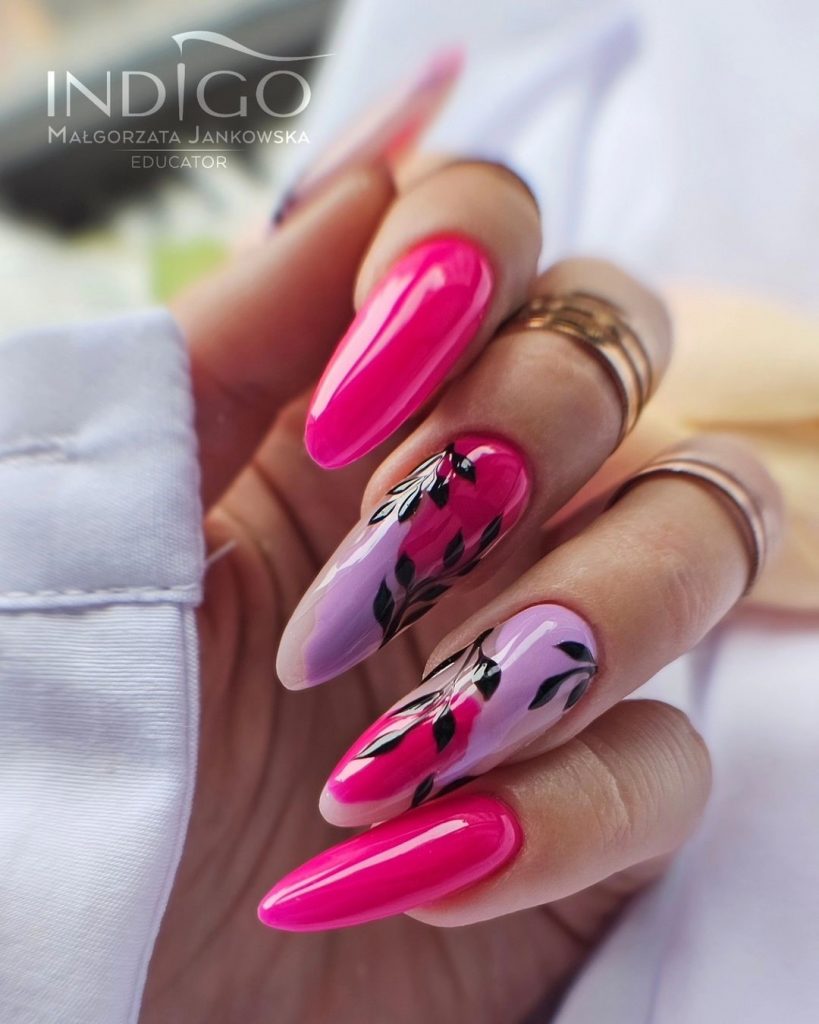
Professional Insights: This vibrant pink nail design, enhanced with artistic black strokes, channels the essence of a flamingo — graceful yet playful. It stands out as a creative summer nail art, perfect for those looking for a unique manicure that’s both fun and stylish.
Materials Required:
- Base coat: Sally Hansen Miracle Cure
- Pink polish: OPI in Strawberry Margarita
- Black for detailing: Konad Stamping Nail Art in Black
- Topcoat: INM Out The Door
DIY Tips: After the base coat, apply your pink polish. Once dry, use a fine brush to add the black details, drawing inspiration from the natural elegance of flamingos. Seal your art with a fast-drying topcoat to preserve the design.
Citrus Edge
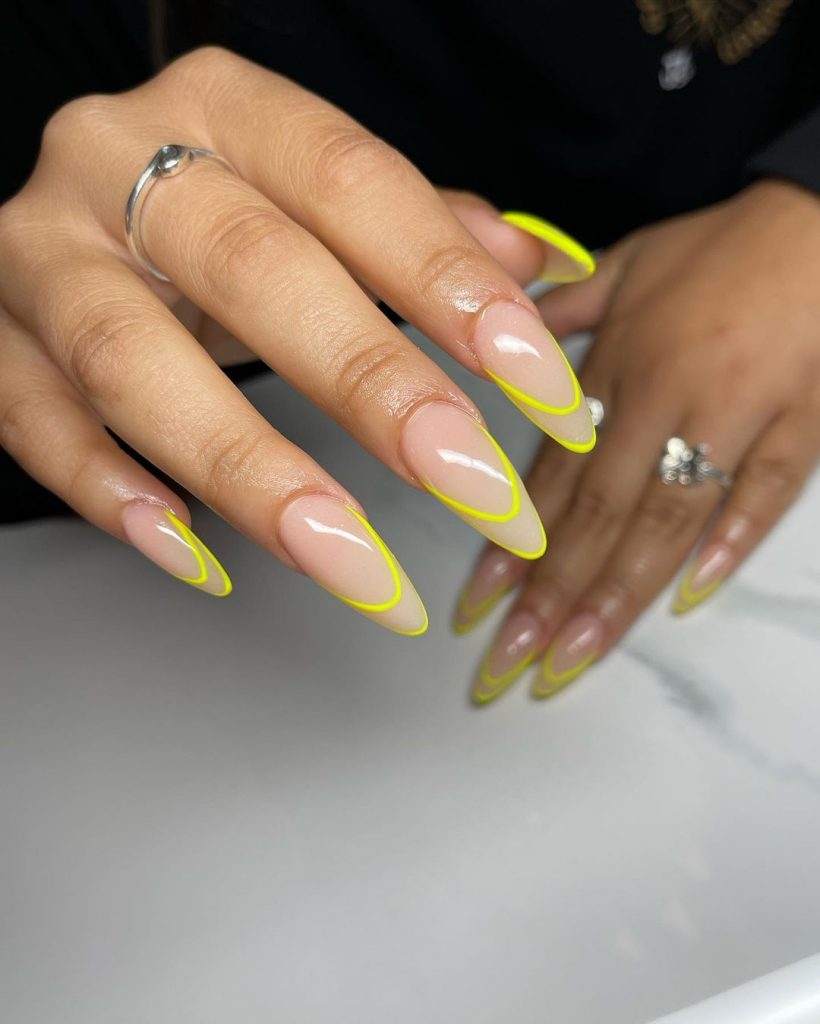
Professional Insights: These nails offer a slice of summer with their neon yellow French tips, giving a citrus twist to the classic look. It’s a fresh, zesty style that will make your hands the center of attention, perfect for anyone ready to embrace the vibrancy of the season.
Materials Required:
- Base coat: Essie Here to Stay
- Nude polish: Zoya in Avery
- Neon yellow polish for tips: China Glaze in Celtic Sun
- Topcoat: Seche Vite Dry Fast Top Coat
DIY Tips: Apply a sheer nude polish as the base for a clean look. For the tips, use a thin brush to apply the neon yellow, creating a sharp and precise edge. A quick-dry topcoat will add durability and shine.
A Pastel Dream: Soft Pinks and Minty Freshness
The Harmony of Pastels and Precious Metals
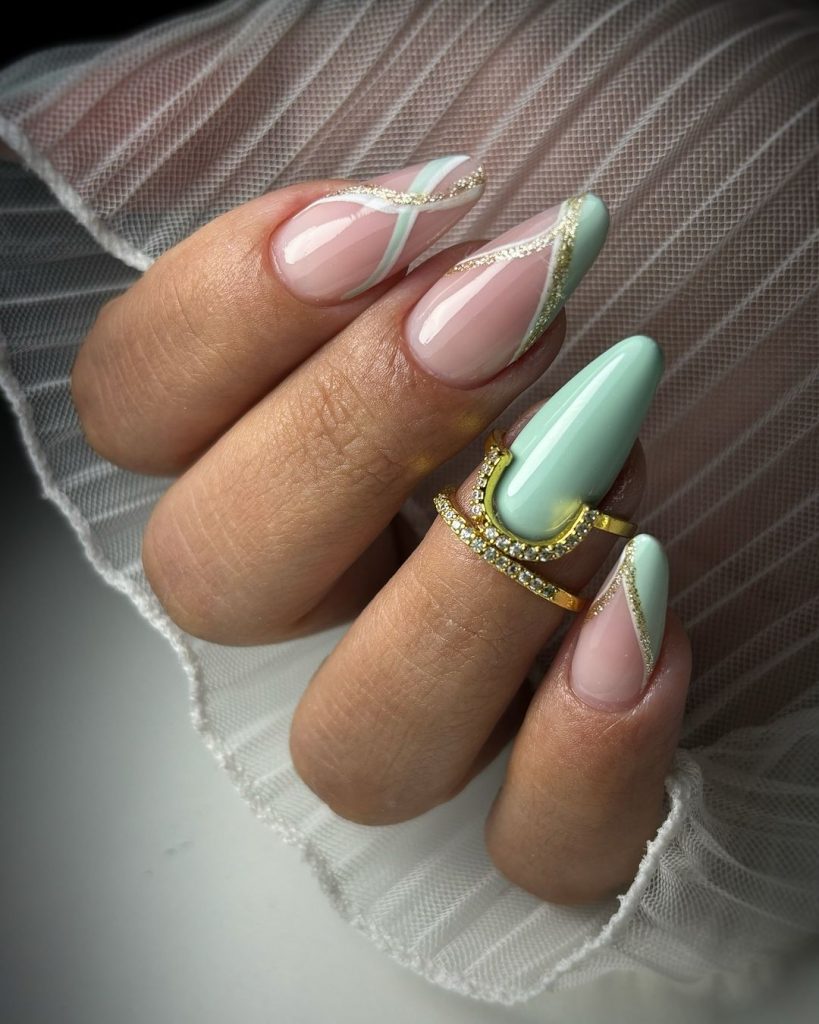
Stepping into the realm of pastels for summer almond nails invites a delicate dance of elegance and subtlety. The manicure marries soft pink hues with a refreshing mint green, divided by a line of gold that adds a luxurious touch. This design is perfect for those looking for a simple yet sophisticated blend of colors with a French tip inspiration that’s suitable for any summer occasion.
- Consumables Needed:
- Pastel pink gel polish
- Mint green gel polish
- Fine gold glitter striping tape
- Glossy top coat
Opt for a high-pigment pastel gel polish for a full and even coverage that embodies the essence of summer. The gold glitter striping tape will add that touch of opulence, creating a multi-dimensional look that catches the light beautifully.
DIY: Crafting Pastel Perfection
Begin by prepping your nails with a good base coat. Apply two coats of pastel pink polish on the nails designated for the soft hue. For the mint green nails, likewise, two coats will do. Ensure each coat is fully dry before applying the next. Carefully place the gold glitter tape at the point where the two colors meet to define the separation. Finish off with a glossy top coat for a long-lasting solid finish that glistens in the summer sun.
Almond Nails: A Canvas for Summer Dreams
Summer’s Elegance: Black and White Chic
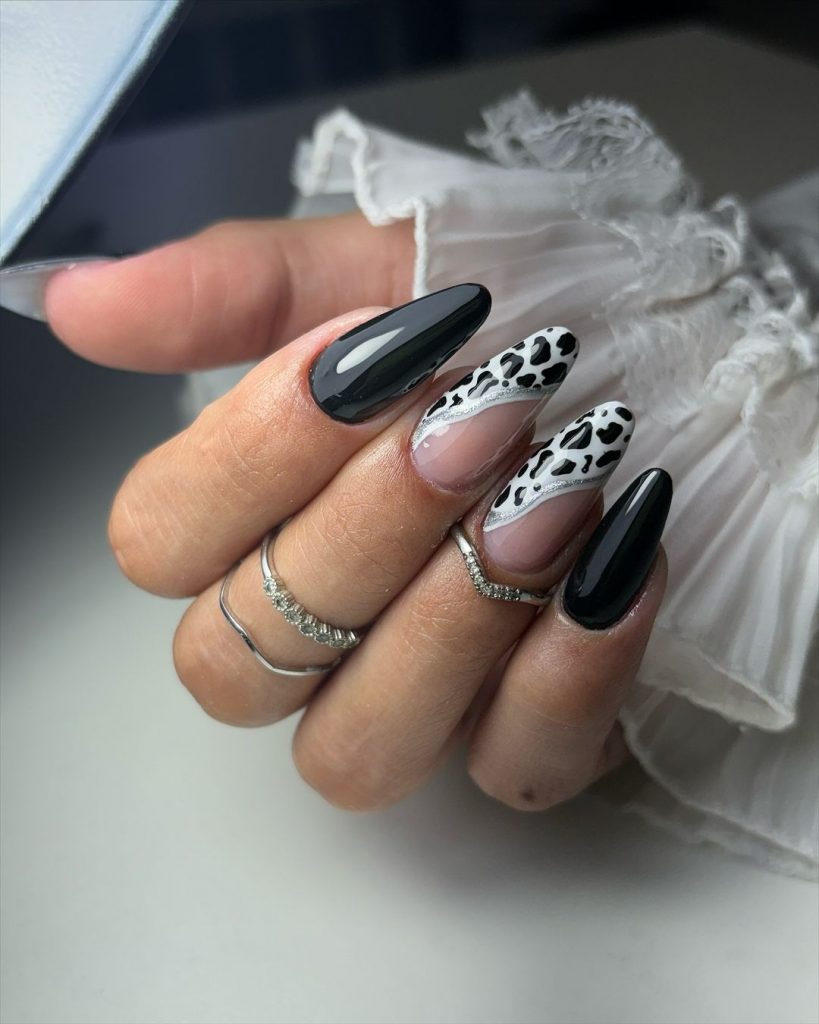
As a professional manicurist, I can tell you that the contrasting simplicity of black and white never goes out of style – it’s timeless, versatile, and chic. The almond nails featured are no exception. Here we see a bold statement with the black solid base on some nails, while others flaunt a playful leopard print. The combination screams both sophistication and fun, ideal for those who want to marry simplicity with a touch of the wild side.
- Consumables Needed:
- Jet black acrylic paint
- White acrylic paint
- High-gloss top coat
- Matte top coat
- Leopard print stencil (optional)
For a truly seamless look, I recommend using a high-quality jet black acrylic paint, paired with a crisp white to achieve that sharp contrast. A high-gloss top coat over the black will give a luxurious shine, while a matte finish on the leopard print can create a stunning textural contrast.
DIY: Step into the Wild
Creating this design at home requires a steady hand and a bit of patience. Start with a clean, dry nail and apply a base coat. For the solid nails, go with two coats of black acrylic, letting each dry thoroughly. For the leopard spots, use a fine-tip brush or a stencil to dab on irregular spots. Once dry, seal with your choice of a high-gloss or matte top coat. Remember, the key is to let each layer dry completely to avoid smudging.
The Serene Blue: A Summer’s Sky on Your Fingertips
Sky Blue Serenity and Seamless Finish
We delve into a serene sky blue that is as peaceful as a calm summer’s day. This solid blue almond-shaped manicure epitomizes what it means to wear the season on your nails. The full, creamy coverage of this polish offers a simple and sophisticated look, which is versatile for both day and night wear.
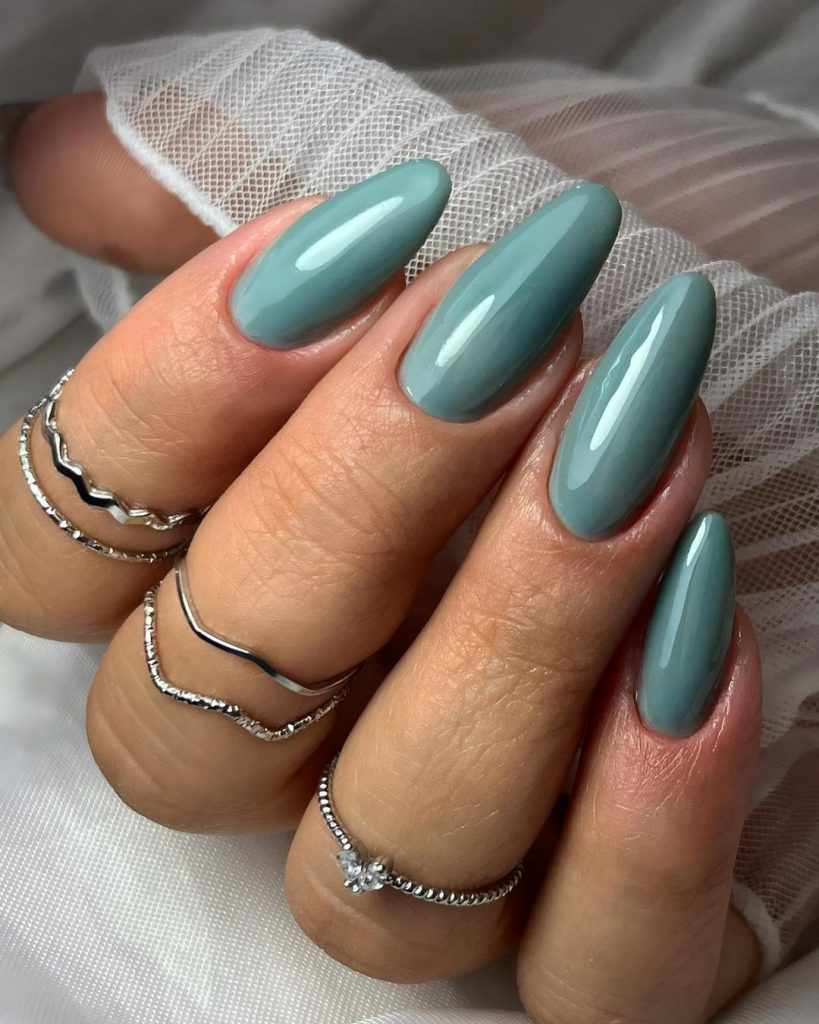
- Consumables Needed:
- Sky blue cream polish
- Base coat
- Glossy top coat
When selecting your polish, aim for a formula that promises a streak-free application. The creamy consistency of the chosen sky blue should provide a solid and opaque finish, reminiscent of tranquil summer skies.
DIY: Blue Horizons at Home
Start with a base coat to protect your natural nails. Apply the sky blue polish in thin, even coats, allowing drying time in between. Two coats should be sufficient for an opaque finish, but if you prefer a deeper intensity, an additional coat can be added. Finish with a glossy top coat to seal in the color and provide that beautiful shine that lasts throughout your summer adventures.
Electric Blue: The Splash of Summer Energy
Vivid Hues and Unapologetic Boldness
The nail design is a true representation of summer’s dynamic spirit. This electric blue is not for the faint-hearted. It’s a color that stands out, ideal for those seeking to add a jolt of energy to their summer style. The almond shape complements the striking color, making for a bold statement piece on your fingertips.
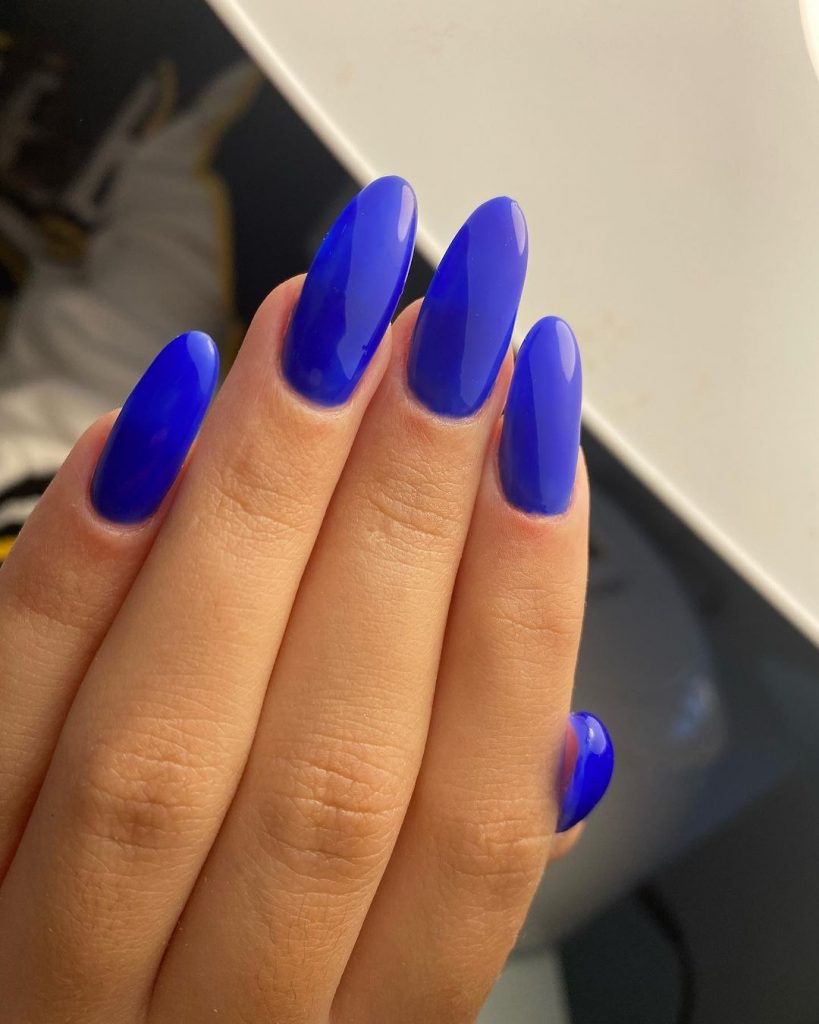
- Consumables Needed:
- Electric blue gel polish
- UV/LED curing lamp
- High-shine top coat
For an intense and long-lasting color payoff, a quality electric blue gel polish is key. Remember to cure under a UV/LED lamp for durability throughout the sunniest of days.
DIY: Make a Splash with Blue
Begin with a prepped nail, applying a base coat and curing it. Then, swipe on the electric blue polish, curing after each coat. Two coats should achieve the full and vibrant look you desire. A high-shine top coat will give it the glossy finish that’s as reflective as calm sea waters under the midday sun.
Lavender Fields: A Touch of Floral in Summer
Softness Meets Creativity: The Pastel Florals
We encounter a nail design that captures the essence of a lavender field swaying in a gentle summer breeze. It’s a playful yet elegant blend of pink and purple with floral designs that evoke a feeling of walking through a blooming garden. The use of ombre techniques alongside patterns and floral art demonstrates a creative celebration of the season.
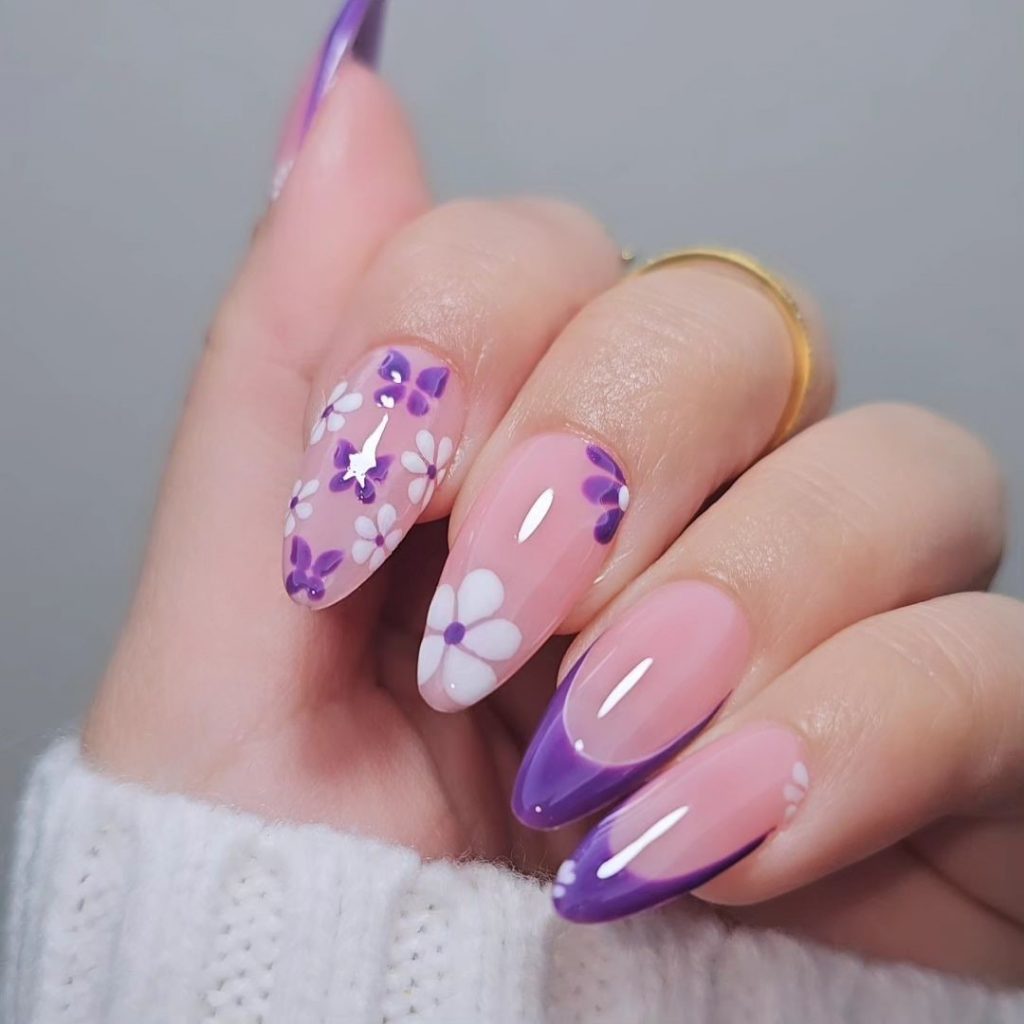
- Consumables Needed:
- Pink gel polish
- Purple gel polish
- White art paint
- Dotting tools
- Fine brush for detail work
I suggest using a lighter pink base that transitions into a soft purple for the perfect ombre effect. The floral patterns can be hand-painted using a fine brush or created with dotting tools for precision.
DIY: Blossoming Beauty
After applying your base coat, blend your pink and purple polishes on the nail, using a sponge for a soft ombre transition. With a fine brush, add delicate white flowers and accentuate with purple dots to mimic the center of the blooms. Finish with a top coat to seal your floral masterpiece.
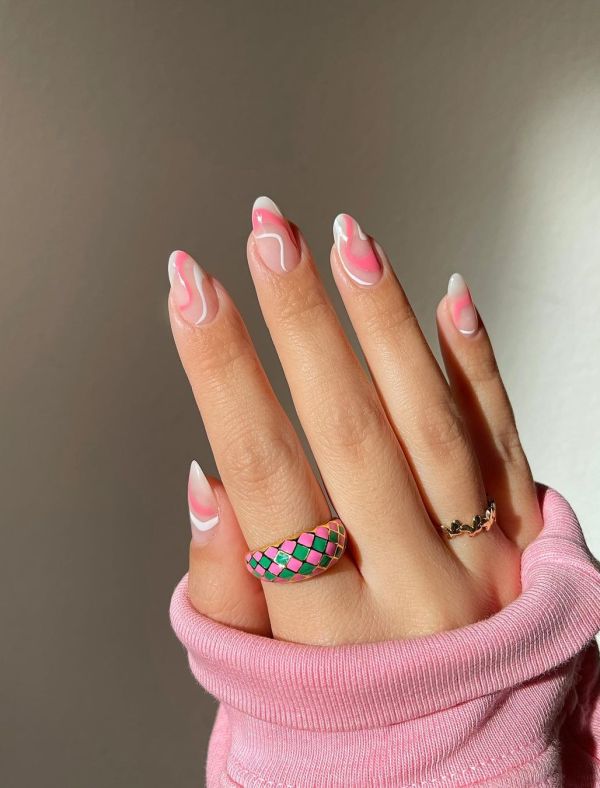
Classic with a Twist: Pink Swirls and White Accents
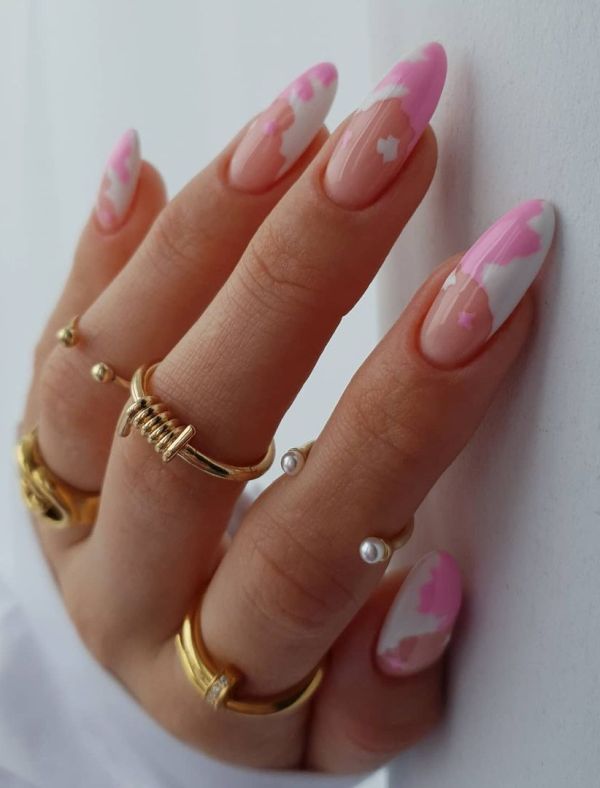
The almond nails showcase a classic pink base with an innovative twist of white swirls. It’s a design that speaks of a playful yet sophisticated approach to nail art, making it an excellent choice for those looking for something simple, yet striking. This manicure can gracefully transition from a casual day look to an elegant evening affair.
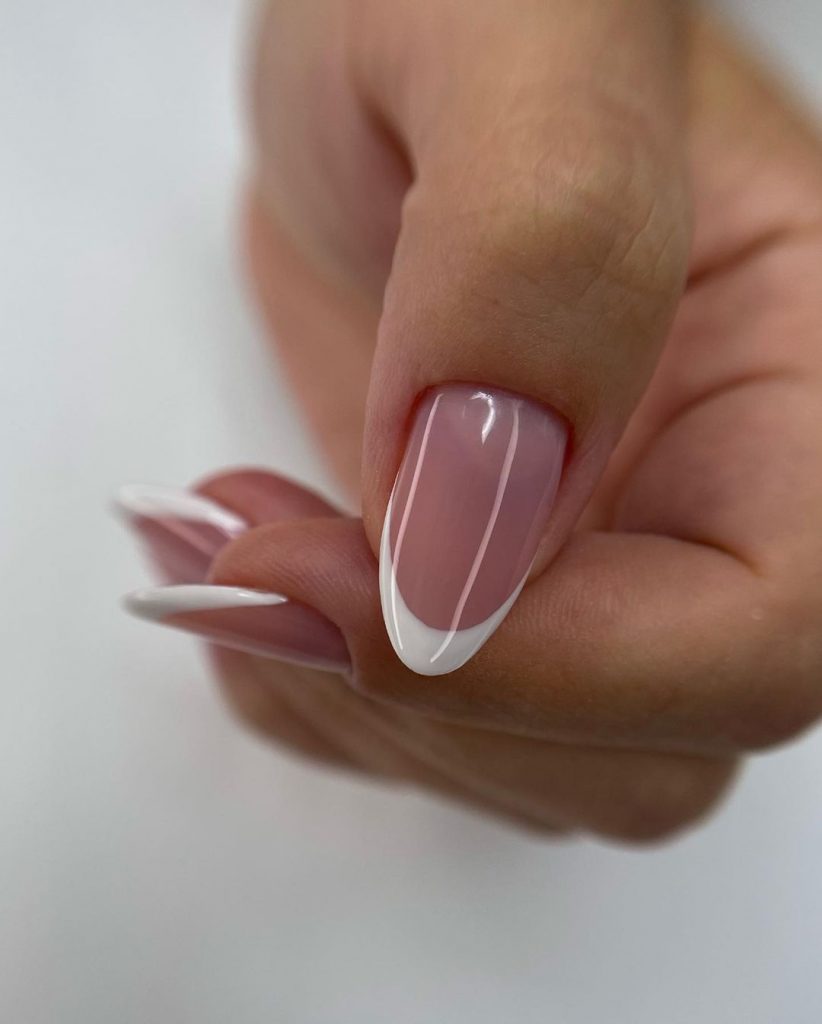
- Consumables Needed:
- Pastel pink gel polish
- White nail art paint
- Detailing brush
- Matte or glossy top coat (based on preference)
A solid pastel pink serves as a wonderful canvas for the white accents. The use of a detailing brush will allow for precision when painting the swirls, which can be as intricate or as minimal as desired.
DIY: Elegance in Every Stroke
Apply the pastel pink polish as your base and let it cure. With a detailing brush, create whimsical white swirls on each nail. The beauty of this design is in its easy execution yet stunning visual impact. A matte top coat can give a modern feel, while glossy ensures timeless elegance.
Save Pin
